If you’re selling products online — whether on your own website, Amazon, or Instagram — great photos can make all the difference. Product photography is more than just taking pictures; it’s about presenting your product in the best possible way so customers feel confident buying it.
Even if you’re not a professional photographer, you can learn the basics and create stunning images that look professional.
Let’s explore step-by-step how to shoot amazing product photos even if you’re a complete beginner.
What Is Product Photography?
Product photography is the process of capturing clear and attractive images of items for marketing or eCommerce. The main goal is to show the product accurately while making it look appealing and professional.
Think about the last time you shopped online — you probably clicked on listings with bright, sharp, and clean images. That’s the power of good photography.
Essential Equipment You’ll Need
You don’t need an expensive setup to start. Here’s a simple checklist of tools:
- Camera – A DSLR or mirrorless camera is great, but even modern smartphones can produce excellent results if used correctly.
- Tripod – Keeps your camera steady and ensures all shots look consistent.
- Lighting – Natural daylight is best for beginners, but you can use affordable LED lights or softboxes for better control.
- White Background – A plain white sheet, poster board, or photo backdrop makes editing easier and looks professional.
- Reflector or Foam Board – Helps bounce light back onto the product to reduce shadows.
Pro Tip: Always clean your product before photographing it — dust, fingerprints, or smudges can ruin your shot.
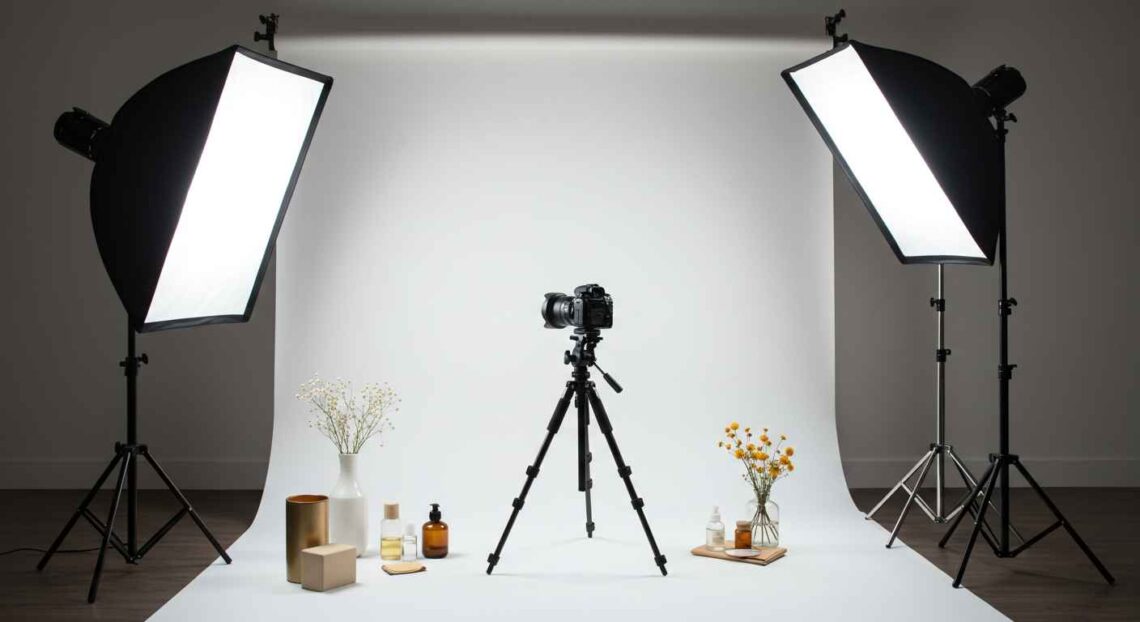
Setting Up Your Lighting
Lighting is the most important factor in photography. Without good lighting, even expensive cameras won’t save your shot.
Here are a few beginner-friendly lighting setups:
- Natural Light Setup – Place your product near a large window with indirect sunlight. Use a white board on the opposite side to fill in shadows.
- Artificial Light Setup – Use two softboxes or LED panels at 45° angles from the product to create balanced light.
- Avoid harsh light – Direct sunlight or bare bulbs can create unwanted reflections and hard shadows.
Remember: consistency matters. Keep your lighting setup the same for all your photos to maintain a clean and professional brand look.
Composition Tips for Product Photos
Composition refers to how you arrange the elements in your frame. Here are some key techniques:
- Rule of Thirds – Imagine your frame divided into 9 equal parts; place the product along the lines or intersections for a balanced look.
- Center Focus – Works great for single product shots or thumbnails.
- Negative Space – Leaving some empty space makes your photo look clean and minimal.
- Angle Variety – Capture multiple angles (front, back, side, top) to show all details.
- Context Shots – Show the product being used (e.g., a mug with coffee) to help customers imagine using it.
Background and Styling
Your background can completely change how your product feels.
- White background – Perfect for eCommerce sites like Amazon or Shopify.
- Colored background – Great for social media or brand-specific styles.
- Lifestyle setup – Adds emotion and context (like photographing shoes outdoors or a candle on a cozy table).
Keep props minimal so the focus stays on your main product.
Editing Your Photos
After capturing your shots, editing helps refine them. You don’t need advanced Photoshop skills — many free online tools do the job easily.
Try these tools:
- Canva – For adding text, filters, and product frames.
- Pixlr – Simple, browser-based editor for color correction.
- Remove.bg – Instantly removes backgrounds.
- Fotor / Photopea – Free Photoshop alternatives.
Basic edits include:
- Adjusting brightness and contrast
- Cropping for better framing
- Sharpening details
- Removing dust or background noise
Shooting Tips for Perfect Product Photos
- Use a tripod to keep all your shots consistent.
- Take multiple shots with different angles and lighting.
- Use manual focus when possible to keep details sharp.
- Shoot in high resolution (RAW if your camera allows).
- Keep your product perfectly clean and dust-free.
- Avoid digital zoom — move closer instead.
Why Product Photography Matters
High-quality images increase:
- Trust – People believe the product is real and professional.
- Sales – Great photos directly impact conversion rates.
- Brand value – Consistent, well-shot images strengthen your brand identity.
In short, your product photos are your brand’s first impression — make them count!
Final Thoughts
Product photography may sound technical at first, but with a few basics, anyone can master it. Start small, experiment with lighting and angles, and keep improving with each shoot.
Remember, practice is the key — the more you shoot, the better your results will get.
So grab your camera or phone, find good light, and start capturing your products today!